Introduction
This tutorial will walk you through running a simple Apache Spark ETL job using Cloudera Data Engineering on Cloudera Public Cloud.
Prerequisites
- Have access to Cloudera Public Cloud with a data lake running.
- Basic AWS CLI skills
- Ensure proper Data Engineering role access
- DEAdmin: enable Data Engineering and create virtual clusters
- DEUser: access virtual cluster and run jobs
Download Assets
Download and unzip tutorial files; remember location where you extracted the files.
Using AWS CLI, copy file access-log.txt to your S3 bucket, s3a://<storage.location>/tutorial-data/data-engineering, where <storage.location> is your environment’s property value for storage.location.base. In this example, property storage.location.base has value s3a://usermarketing-cdp-demo, therefore the command will be:
aws s3 cp access.log.txt s3://usermarketing-cdp-demo/tutorial-data/data-engineering/access-log.txt


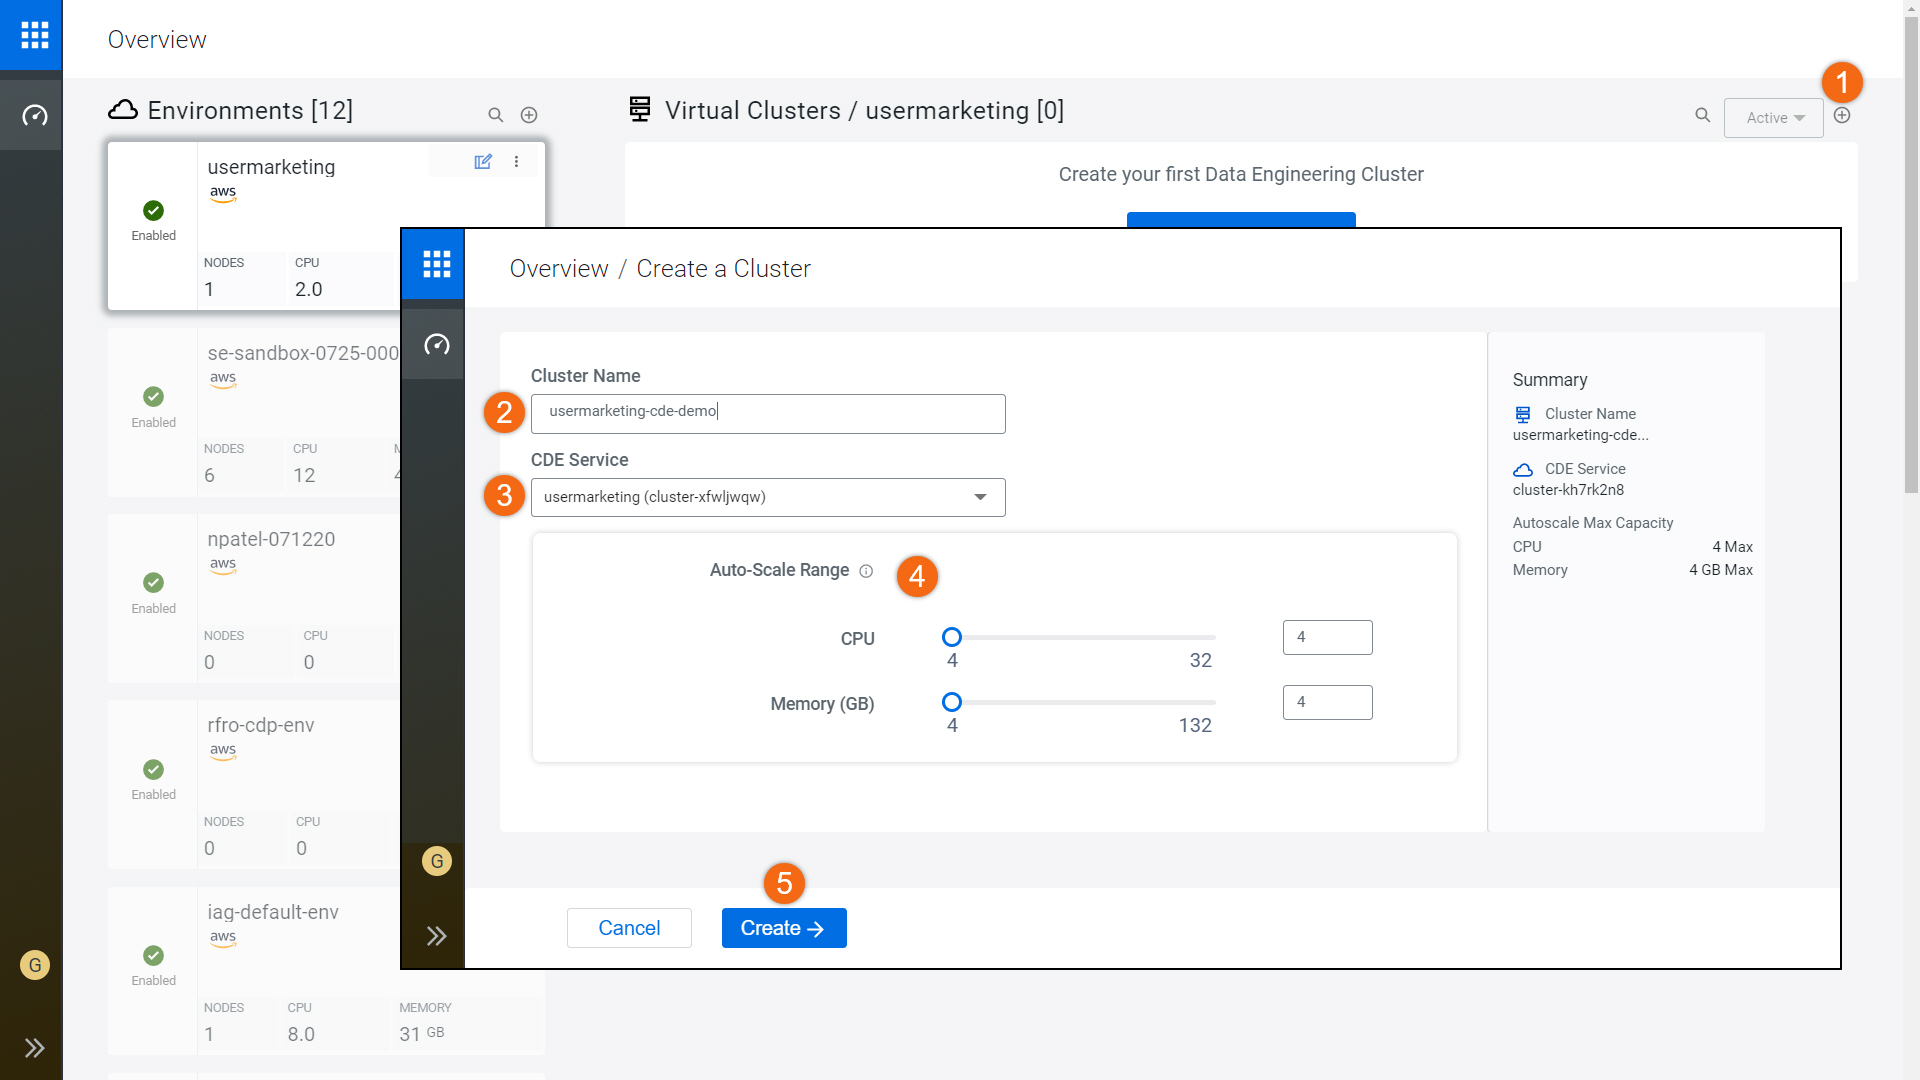
- Click on
 to enable new Cloudera Data Engineering
 - Provide the environment name:
usermarketing - Workload Type: General - Small
- Set Auto-Scale Range: Min 1, Max 20


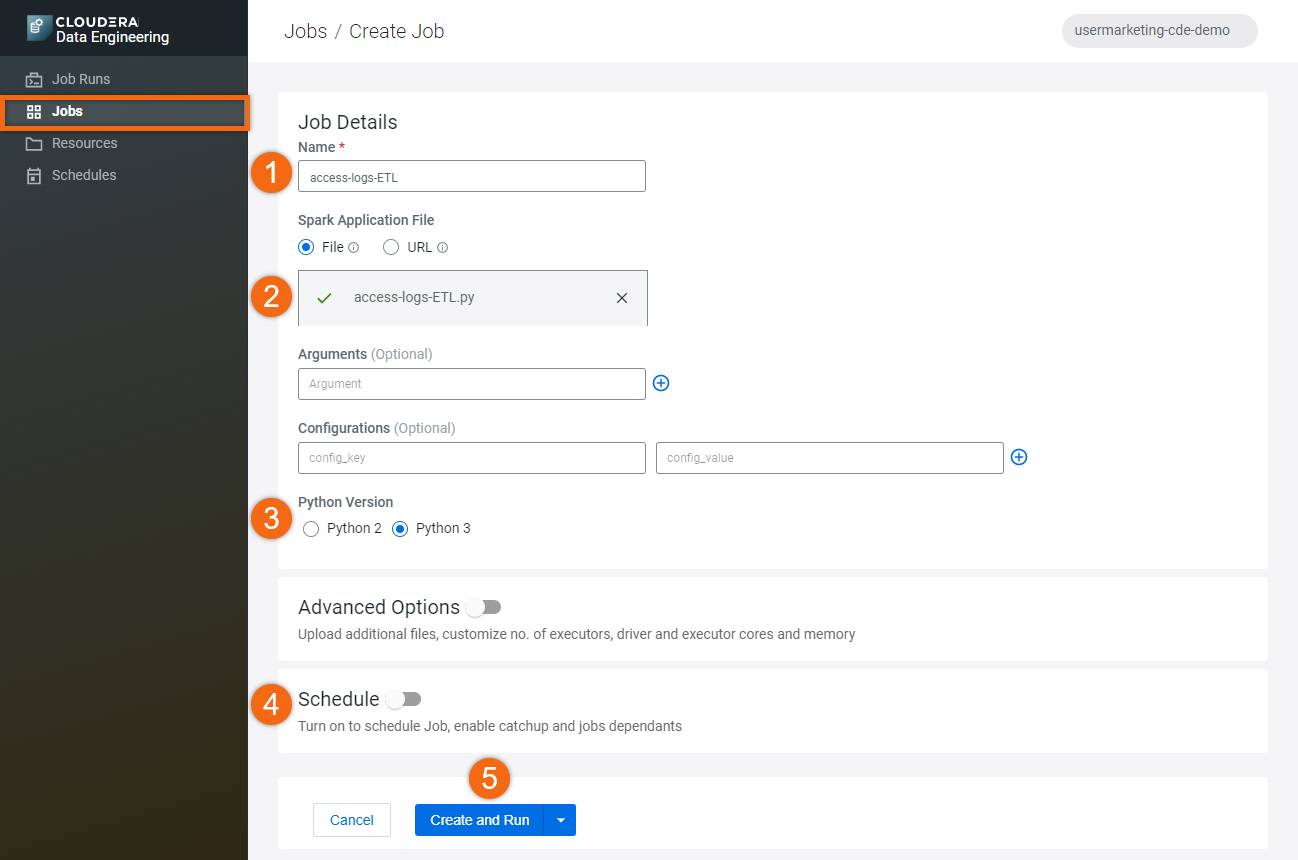
In the Jobs section, select Create Job to create a job, access-logs-ETL - fill out job details:
- Name:
access-logs-ETL - Upload File: access-logs-ETL.py, from tutorial files provided
- Select Python 3
- Turn off Schedule
- Create and Run
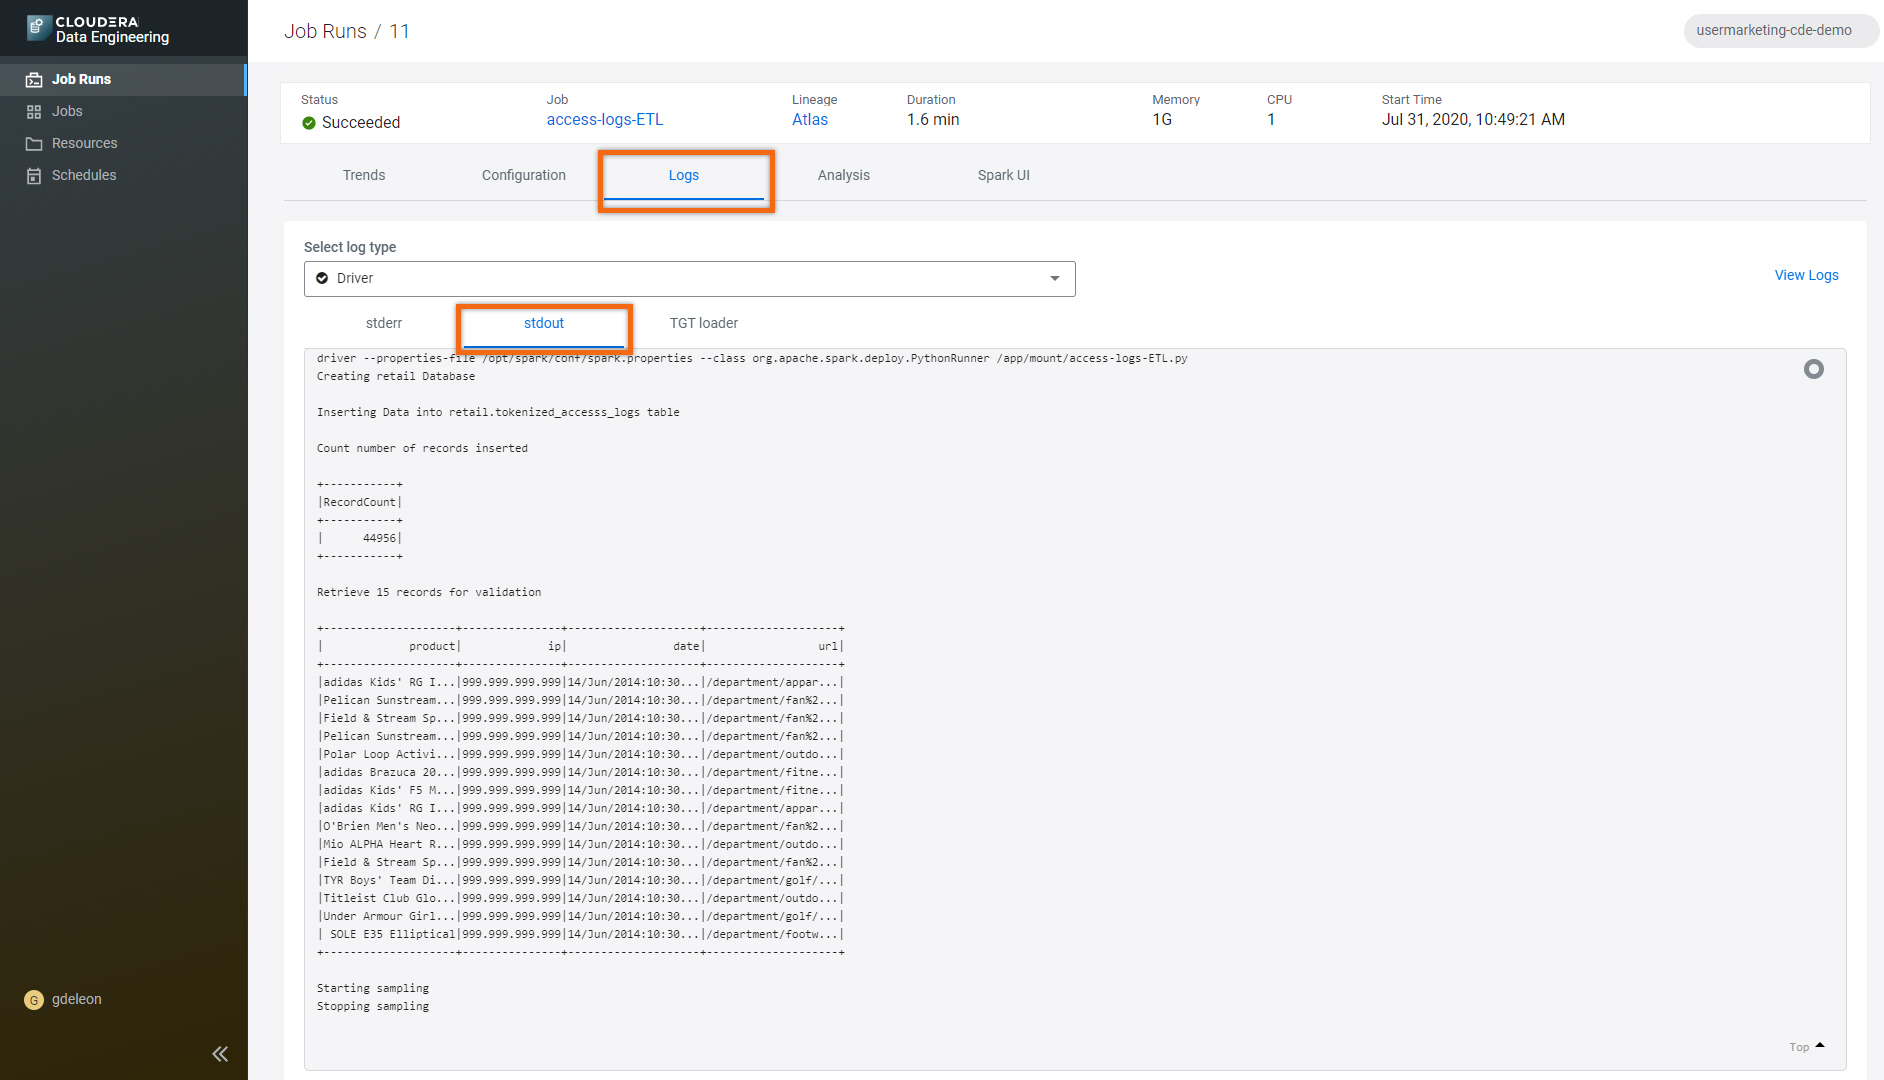
Let’s take a look at the job output generated. In the Job Runs section, select the Run ID for the Job you are interested in. In this case, let’s select Run ID 11 associated with Job access-logs-ETL.

Let’s take a look at the job output. Here you can see all of the output from the Spark job that has just been run. You can see that this spark job prints some user-friendly segments of the data being processed so the data engineer can validate that the process is working correctly.
Select Logs > stdout
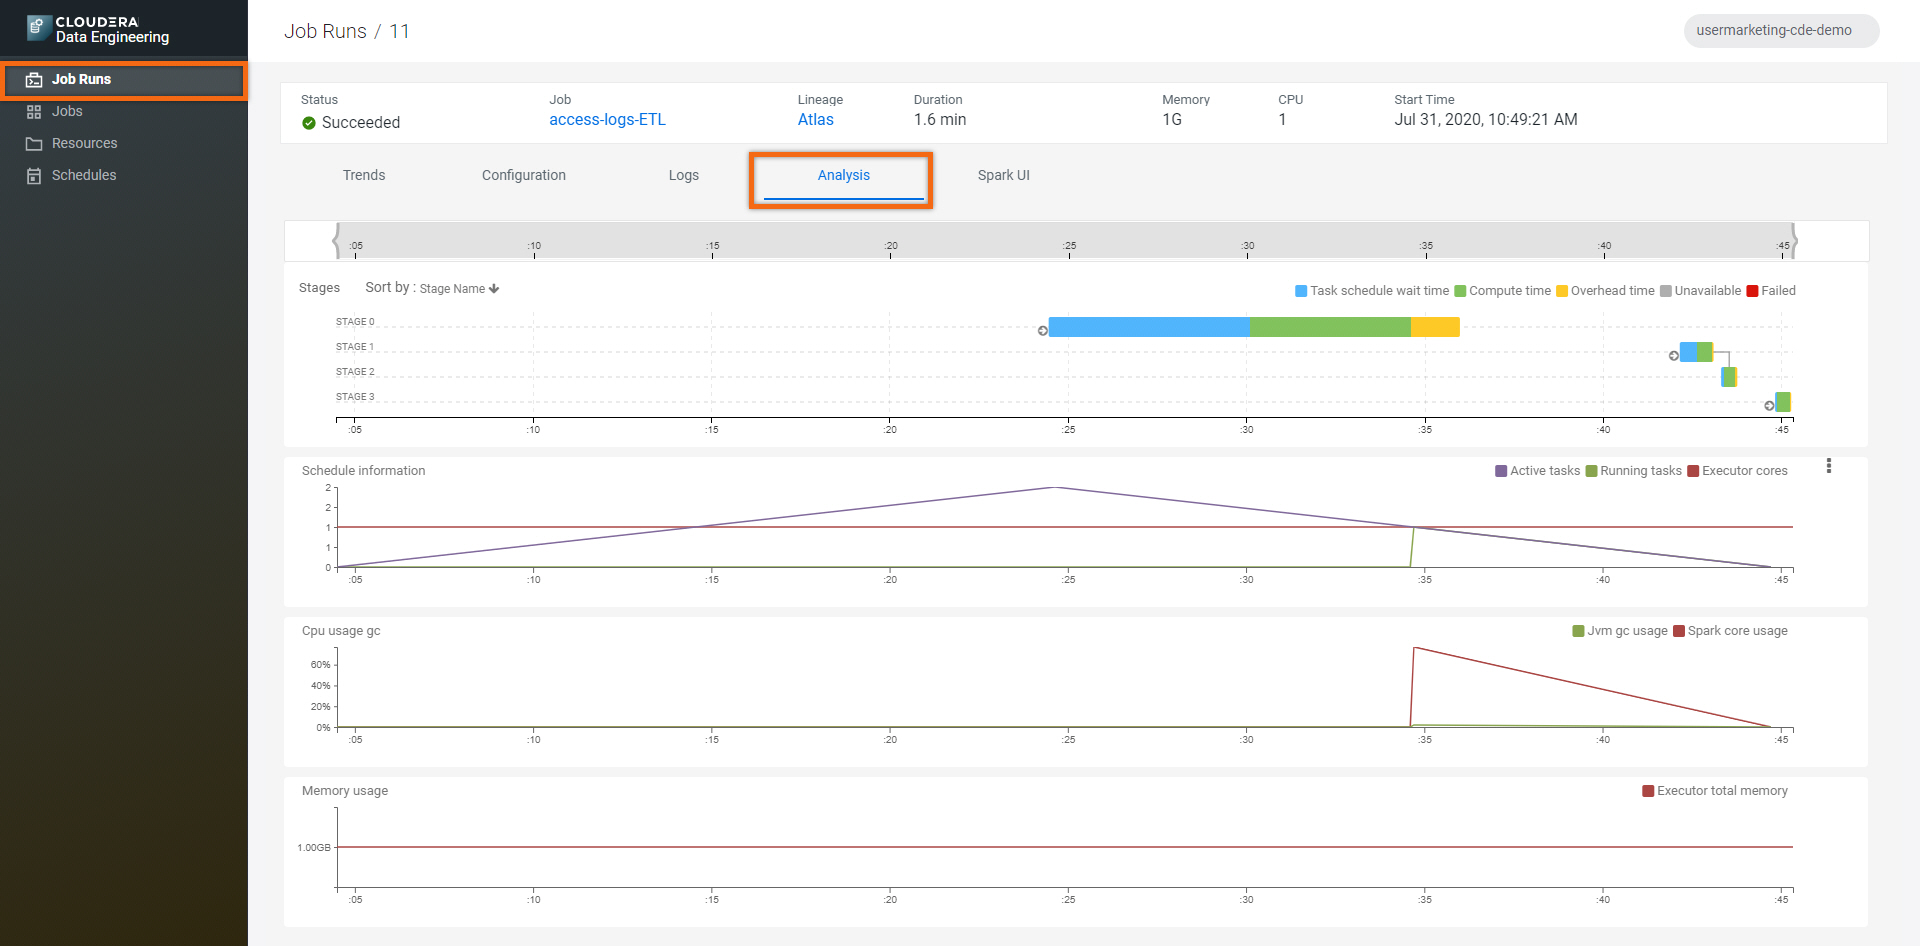
Let’s take a deeper look and see the different stages of the job. You can see that the Spark job has been split into multiple stages. You can zoom into each stage getting utilization details on each stage. These details will help the data engineer to validate the job is working correctly and utilizing the right amount of resources.
You are encouraged to explore all the stages of the job.
Select Analysis.
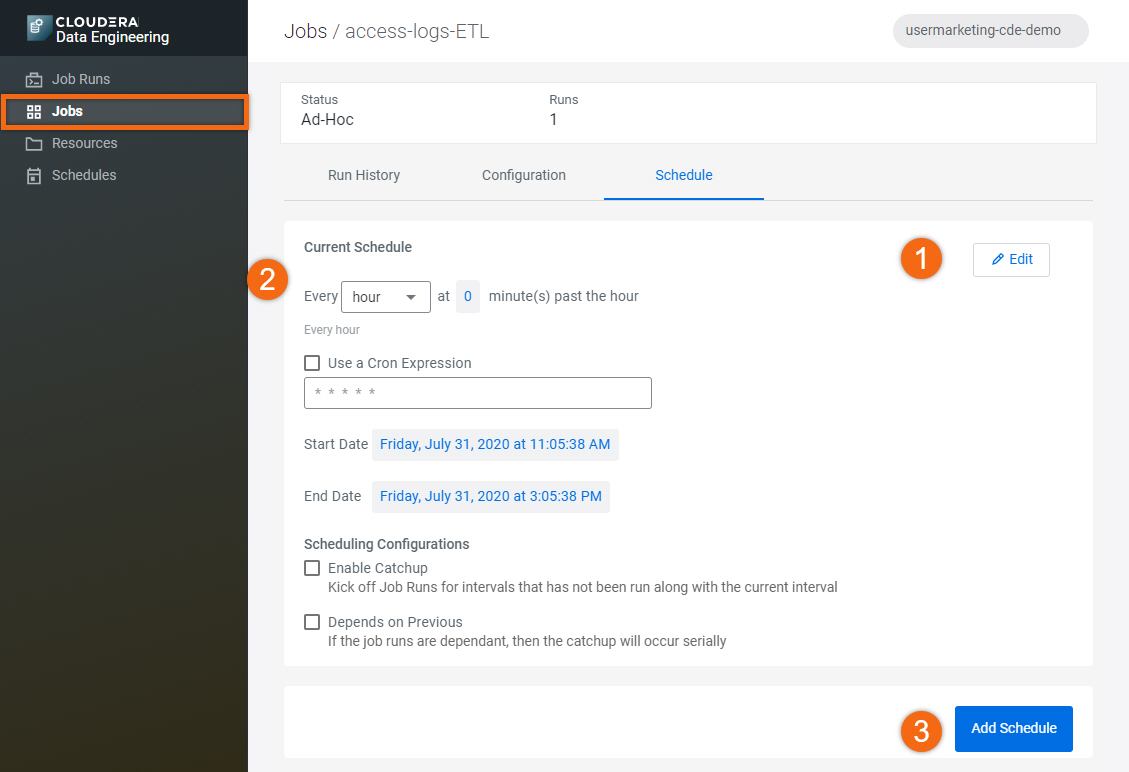
Once you are satisfied with the application and its output, we can schedule it to run periodically based on time interval.
In the Jobs section, select ![]() next to the job you’d like to schedule runs.
next to the job you’d like to schedule runs.
Select Add Schedule.

- Select Edit
- Set schedule: Every hour at 0 minute(s) past the hour
- Add Schedule
